
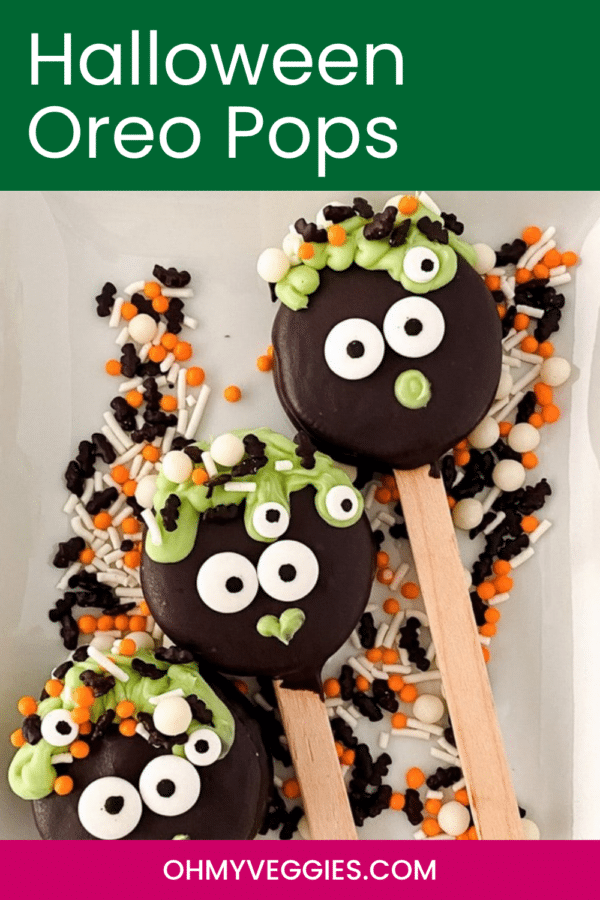
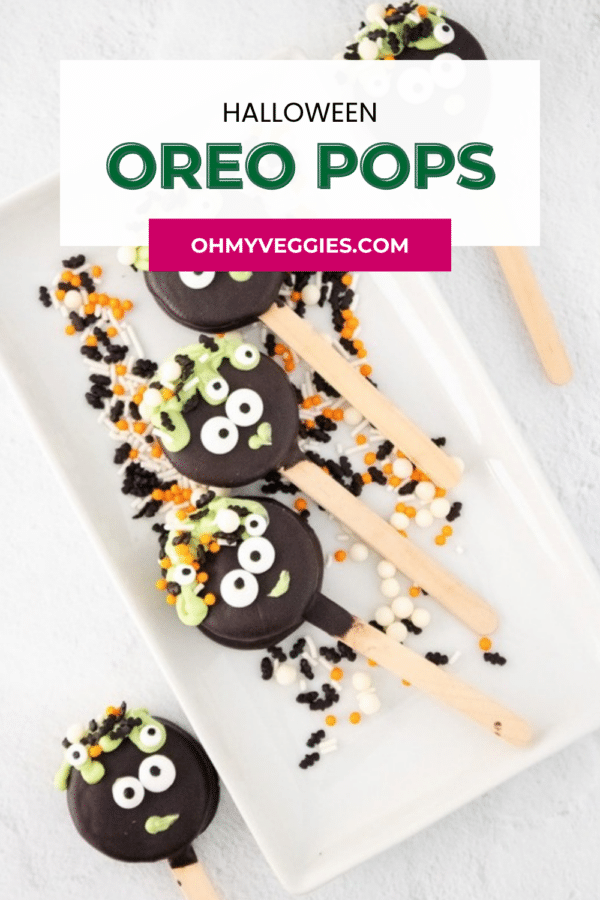



Stir up some magic with these bewitching Halloween Oreo Pops! Inspired by a witch's bubbling cauldron, these treats are bursting with spooky charm.

Halloween has always been one of my favorite holidays. We load up the house with Halloween decorations as soon as October 1st rolls around. But I've recently realized that I didn't have nearly enough Halloween recipes on the blog.
So I've been rectifying that with sweet treats like these Mummy Cakesicles and these Vegan Halloween Cookies. And now my latest addition - these Halloween Oreo Pops!
These adorable little morsels are easy to craft and even easier to devour. And bound to cast a spell on both kids and adults alike!

Supplies You'll Need
Here are all the things you'll need to design your own little witch's cauldron Oreo pops!
Oreo Cookies. Classic Oreo sandwich cookies are the base of each cauldron. Regular Oreos work perfectly, and Double Stuf Oreos give you a little more filling to anchor the stick. Any chocolate sandwich cookie will do if you prefer a store brand. Oreos themselves are made without dairy, but most candy melts contain milk, so these pops are vegetarian rather than vegan as written (see the Variations below for an easy vegan swap).
Black and Lime Green Candy Melts. I like to use these Wilton candy melts, as they come in many colors and are easy to work with. (I have noticed that the green color goes in and out of stock, so try these alternative green melts if needed!)
Halloween Sprinkles. Really any sprinkles of your choice are fine. I like these sprinkles with the extra little eyeballs. Perfect for a cauldron!
Popsicle Sticks. You can grab a big pack of popsicle sticks online. Alternatively, lollipop sticks work too. (And if you have extras, use them to make these skeleton cupcakes!)
Coconut Oil. We'll use a bit of coconut oil to thin out the candy melts a bit, so they are easier to work with.
Candy Eyes. For the eyeballs, of course. These jumbo candy eyes are perfect.
Piping Bag. For piping those lime green bubbles onto our cauldrons. I like the disposable ones for easy cleanup.
Parchment Paper. For lining a baking sheet to let the Oreo pops set after decorating.

How to Decorate the Halloween Oreo Pops
Start by melting the black candy melts. Just pop them in the microwave for 30 seconds, stirring and repeating until they're melted and smooth.
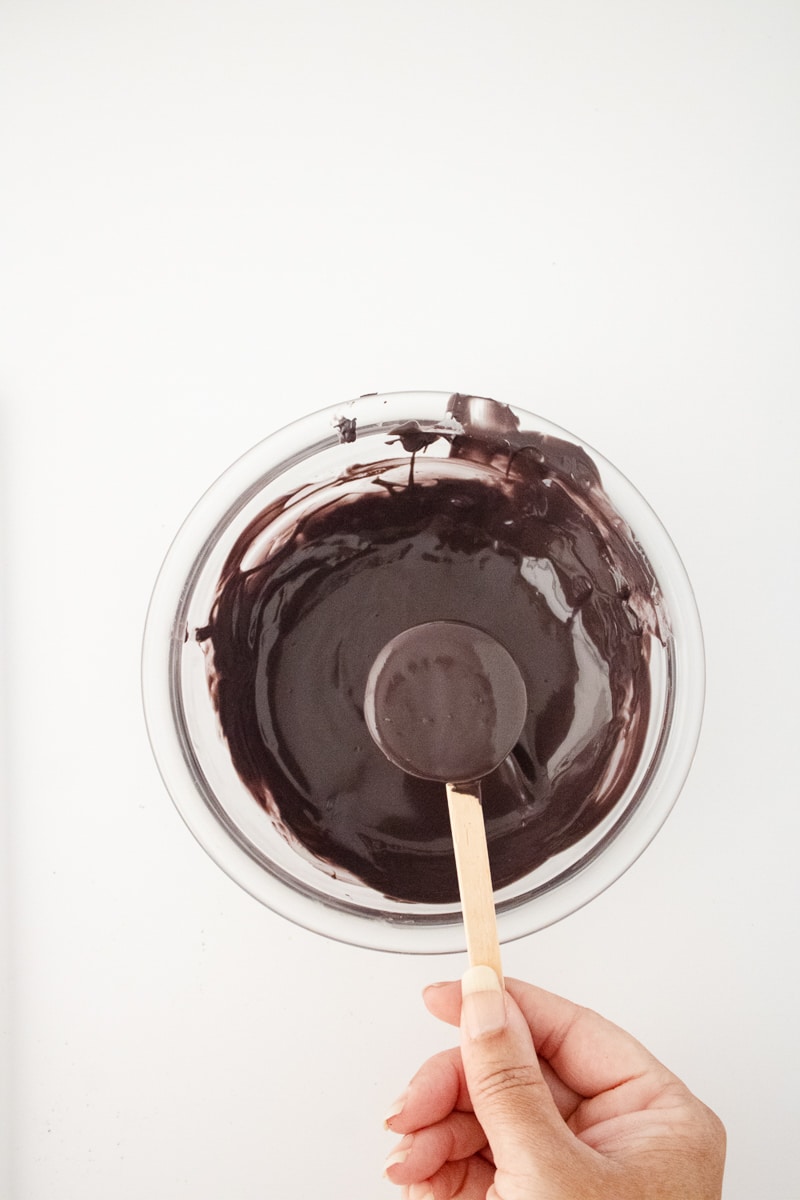
Now, I found the melted candy to be a bit too thick, so I added in about a teaspoon of coconut oil to get the perfect dipping consistency. Use your judgment here, as every brand will be a bit different.

Take your Oreo and gently pry one side off. Pop the stick right in the center, dab on some of the melted candy, and sandwich it back together with the other half of the cookie. Repeat with all of your Oreos. Chill them for about five minutes to allow them to set.
Now for the fun part! Dip your Oreo-cookie-on-a-stick into the black melted candy, making sure you get a good coating on both sides. Give it a little wiggle to shed any excess drips.

Lay the Oreo pops on a sheet of parchment paper and let them dry for about 10 minutes or until it feels hardened and set.

For the witchy green details, fill a piping bag with green candy melt. Melt it in the microwave in 30-second spurts, just like you did with the black candies.

Snip a small tip off the piping bag and drizzle on that vibrant green coloring. And don't forget to jazz it up with some Halloween sprinkles!
And the candy eyes? Just use a dab of the melted chocolate to stick them onto the cauldron. Then, pipe on a cheeky green grin!

Finally, let everything set for another 10-15 minutes, and voila! Your wickedly delightful Oreo Pops are ready to be devoured.

Helpful Tips
Get the coating consistency right first. Candy melts straight from the microwave are often too thick for a smooth dip. Stir in coconut oil a little at a time (start with 1 teaspoon) until the melted candy drips off a spoon in a steady ribbon. Too thick and the coating goes on lumpy; too thin and it won't cover the cookie's dark surface evenly.
Melt low and slow. Candy melts scorch easily. Use 30-second bursts at 50% power if your microwave runs hot, and stir well between each one. The candy keeps melting as you stir, so stop heating while a few small pieces are still visible.
Let the sticks set before dipping. That short chill after you sandwich the stick between the cookie halves really matters. If the "glue" isn't firm, the cookie can slide right off the stick and into the bowl of melted candy.
Use a deep, narrow bowl or mug for dipping. A deeper pool of melted candy makes it much easier to coat the whole cookie in one smooth dip, rather than spooning coating over it. Rewarm the candy for 10-15 seconds whenever it starts to thicken.
Decorate while the green is still wet. Add the sprinkles and press on the candy eyes right after piping the green bubbles, so they stick without extra glue. Work on two or three pops at a time rather than piping all of them first.
Variations
- Make them vegan. Swap the candy melts for dairy-free dark chocolate (tinted with black oil-based food coloring if you like) and vegan white chocolate tinted green. Check the labels on your sprinkles and candy eyes too, since some use confectioner's glaze.
- Monster pops. Skip the cauldron bubbles, dip the cookies in green candy melts instead, and give each one a pair of mismatched candy eyes and a black-piped zigzag mouth.
- Pumpkin pops. Dip in orange candy melts and pipe a small green stem and a jack-o'-lantern face in black.
- Mummy pops. Dip in white candy melts, then drizzle thin white lines back and forth across the cookie and finish with two candy eyes peeking out, just like our Halloween Mummy Brownies.
- Flavored cookies. Try Golden Oreos, mint Oreos, or a seasonal flavor for a surprise inside the spooky coating.
Serving Ideas
These Halloween Oreo Pops are made for parties. Stand them upright in a cup or small bucket filled with candy corn or sprinkles for an easy centerpiece, or lay them out on a platter scattered with extra Halloween sprinkles. Wrapped individually in cellophane treat bags and tied with ribbon, they also make adorable class treats or party favors.
For a full spooky dessert table, pair them with our Cute Chocolate Halloween Cookies, a bowl of Fall Snack Mix, and a batch of Caramel Popcorn Balls.
Storing & Freezing
Store the finished Oreo pops in an airtight container at cool room temperature for up to 1 week, laying them flat in a single layer (or with parchment paper between layers) so the decorations don't get squished. You can also keep them in the refrigerator for up to 2 weeks; let them come back to room temperature before serving so the cookie softens slightly.
To freeze, place the fully set pops in a freezer-safe container between layers of parchment paper and freeze for up to 2 months. Thaw them in the refrigerator overnight while still in the closed container, which keeps condensation from forming on the candy coating and spotting the decorations.

More Halloween Fun
If you love these Halloween Oreo Pops, be sure to check out these other spooky treats:
- My Fave Spooky & Sweet Halloween Treats
- Mummy Halloween Cupcakes
- Vegan Pumpkin Cookies
- No-Bake Vegan Cake Pops
📖 Recipe
Equipment
Ingredients
- 10 oz Black Candy Melts
- 10 oz Lime Green Candy Melts, you will have some left over
- 3 tablespoon Halloween Sprinkles
- 1-2 teaspoon Coconut Oil, to thin the black candy melts
- 10 Oreo Cookies, regular or Double Stuf
- 20 Candy Eyes, about 2 per pop
Instructions
- Melt the black candy melts in the microwave in a microwave-safe bowl. Heat in 30 second increments, stirring and repeating until the candies are melted and smooth.
- Add 1-2 teaspoon of coconut oil to the melted candies and stir, to thin out the mixture slightly. You can add more or less coconut oil to reach the desired consistency - the amount needed will vary based on the brand of candy melts being used.
- Remove one of the sides of the Oreo cookie gently. Position the stick in the center of the cookie and use a few drops of melted candy to hold it in place. Add the top cookie back and press together gently. Let set for 5 minutes before continuing.

- Carefully dip each Oreo pop into the melted black candy, coating both sides completely. Gently shake off any excess candy coating.
- Place on parchment paper to dry for 10-15 minutes, or until the candy coating is hardened and cooled.
- Melt the green candy melts in the microwave the same way as the black ones. Carefully spoon them into a piping bag (they will be hot) and snip off a small tip.

- Pipe the green "bubbles" along the top edge of each pop.
- Immediately top with the Halloween sprinkles.
- Use a dab of leftover melted candy to stick on the candy eyes, then pipe on a small green mouth.
- Let set for 10-15 minutes, until fully hardened, before serving.




Something to say? Leave a comment.