
Jump to:
Crepes are the little black dress of the food world. In a word: versatile. They're great for breakfast, lunch or dinner. They can be made sweet or savory. They're great straight up, with nothing but a little sprinkle of sugar to embellish them- and they're also fabulous with the fanciest fillings you can dream up.
Crepes are also one of those recipes that can be very intimidating if you've never made them before. But trust me, they're easier than you think!
I've broken it down step by step so that learning how to make crepes -- nay, how to make perfect crepes -- will be a cinch.
Ingredients for Crepes
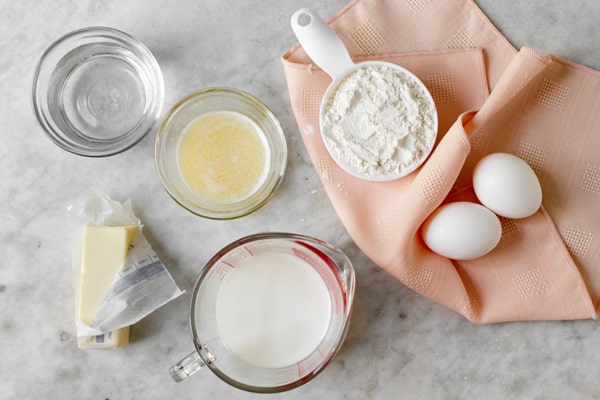
Pretty much all crepe recipes start with the same basic formula: milk, eggs, melted butter, flour and water. You'll also need a bit of extra butter for greasing the pan.
Once you've got a basic crepe recipe down, you may want to expand your horizons, experimenting with other types of flour (buckwheat crepes are amazing!) or even with vegan crepes.
For now, we've started with a 100% reliable basic crepe recipe.
Step 1 - Blend the Batter
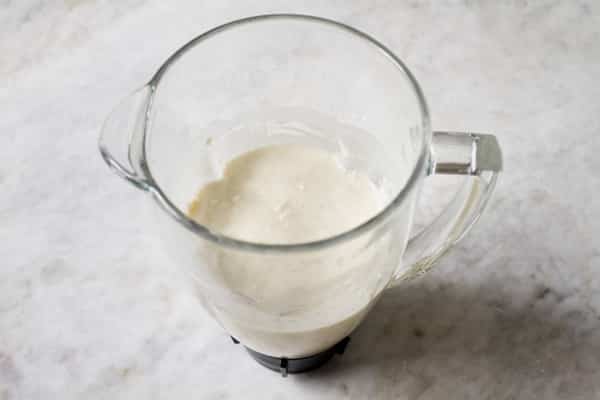
Using a blender is the easiest way to get a beautifully smooth crepe batter. Simply place all of the ingredients into your blender, pulse a few times to combine, then whirl for a moment until smooth.
Don't have a blender? No problem. A bowl, a whisk and a little elbow grease will do the trick. Whisk vigorously until the batter is free from any lumps.
Step 2 - Chill the Crepe Batter
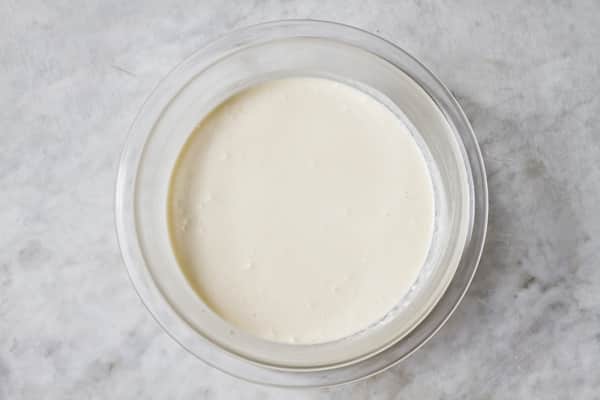
Next, you'll want to refrigerate your crepe batter and allow it to chill. This allows the flour to fully absorb into the liquid and will result in much more tender crepes than if you were to cook them right away.
Your batter should rest in the fridge for at least one hour. You can even make your crepe batter the night before and let it rest overnight in the fridge.
When you're ready to make crepes, give the batter a good stir as the flour will have settled to the bottom of the bowl.
Step 3 - Grease Your Pan Well!
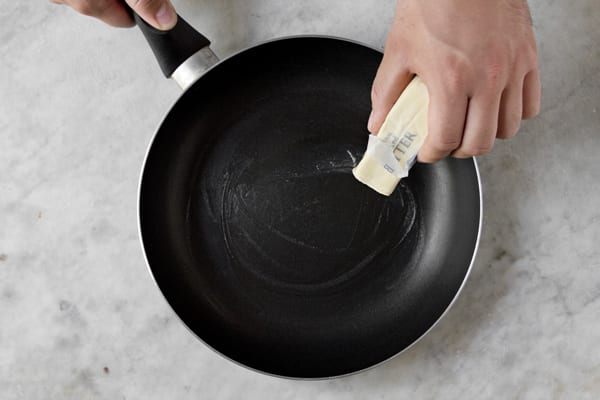
When you're ready to start making your crepes, heat a nonstick pan over medium-high heat. A crepe pan is the perfect tool if you have one - as the shape makes them really easy to flip.
Don't have a crepe pan? Don't worry! A non-stick pan will work perfectly well for crepe making, or a well-seasoned cast iron pan will do the trick too.
After the pan is heated, you'll need to grease it with butter for the first crepe or two. After that the pan should be sufficiently hot and 'seasoned' with the first couple of crepes. If you find that subsequent crepes are sticking, a little top-up of butter should get things moving.
Step 4 - Swirl the Batter in the Pan
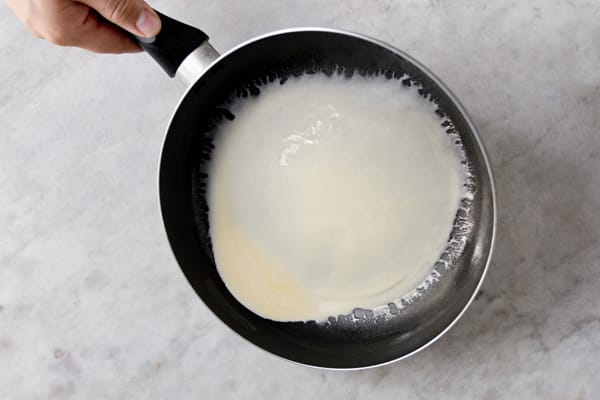
Add a small amount of batter, about two tablespoons, to the center of your pan, and swirl to coat. It may take a few tries to figure out the perfect amount of batter. It should fully cover the bottom of the pan, but should be uniformly thin. If your crepe turns out a bit too thick, add a little less batter next time. Crepe too thin? Add a touch more batter.
The first couple of crepes are rarely beautiful, even for seasoned crepe-makers. Consider them a cook's snack!
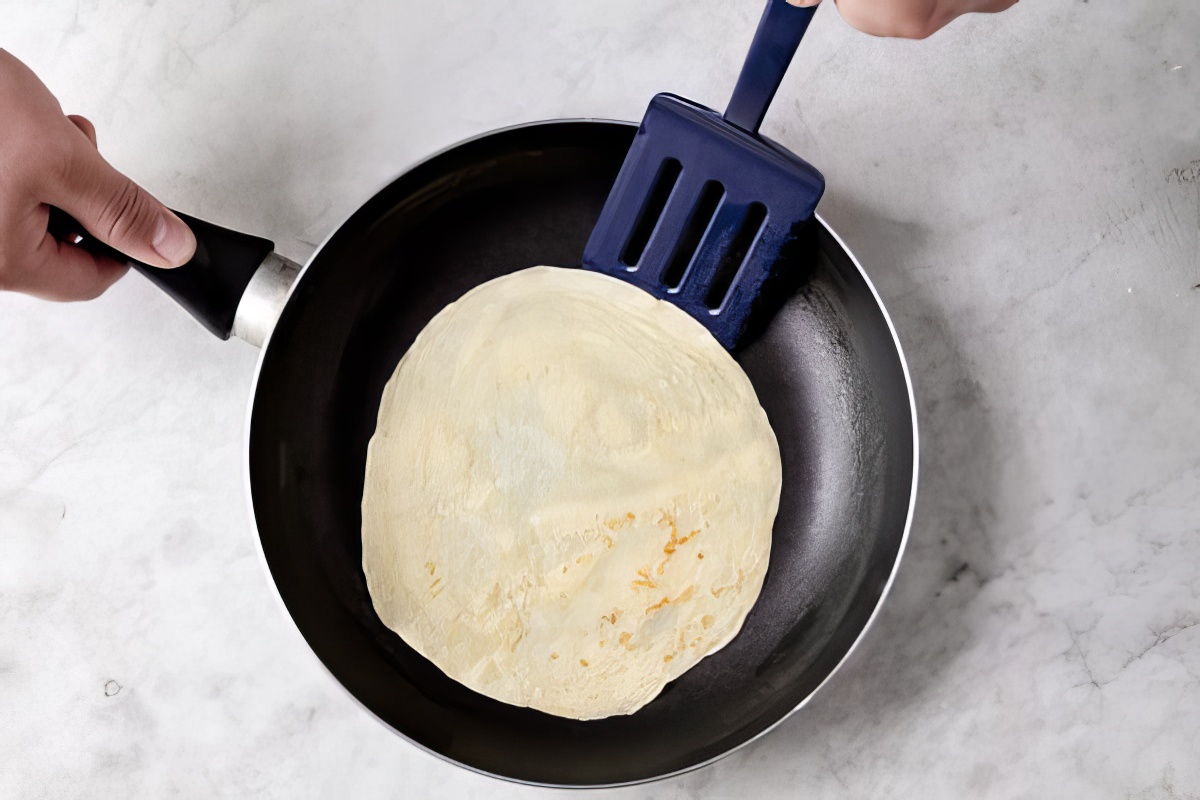
Step 5 - Flip the Crepe Over (Carefully!)

Your crepe will cook for about 30-40 seconds on the first side. You'll know it's ready to flip when the edges start to lift from the pan. Carefully slide a spatula under the crepe and flip! Cook for another 10-20 seconds or so on the second side. Remember that the next crepe will cook faster, as the pan gets hotter!
Remove the finished crepe from the pan and onto a waiting plate, cutting board, or wire rack to cool. Repeat for all the remaining crepes!
Crepe Variations
For sweeter crepes, try adding any of these mix-ins to the crepe batter:
- 2 tablespoon sugar - I like brown sugar crepes!
- 1 teaspoon vanilla extract
- 2 tablespoon of sweet liqueur
- 1-2 tablespoon cocoa powder - for chocolate crepes.
For savory crepes, experiment with these tasty additions:
- ¼ teaspoon salt
- 2 tablespoon chopped herbs such as dill or rosemary
- ⅛ teaspoon chili powder - for spicy crepes!
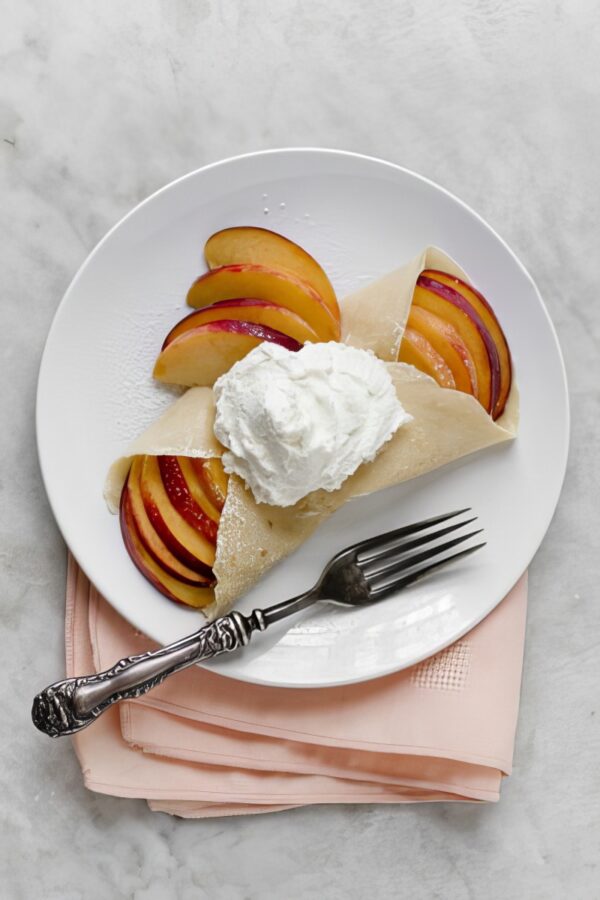
The Best Crepe Fillings
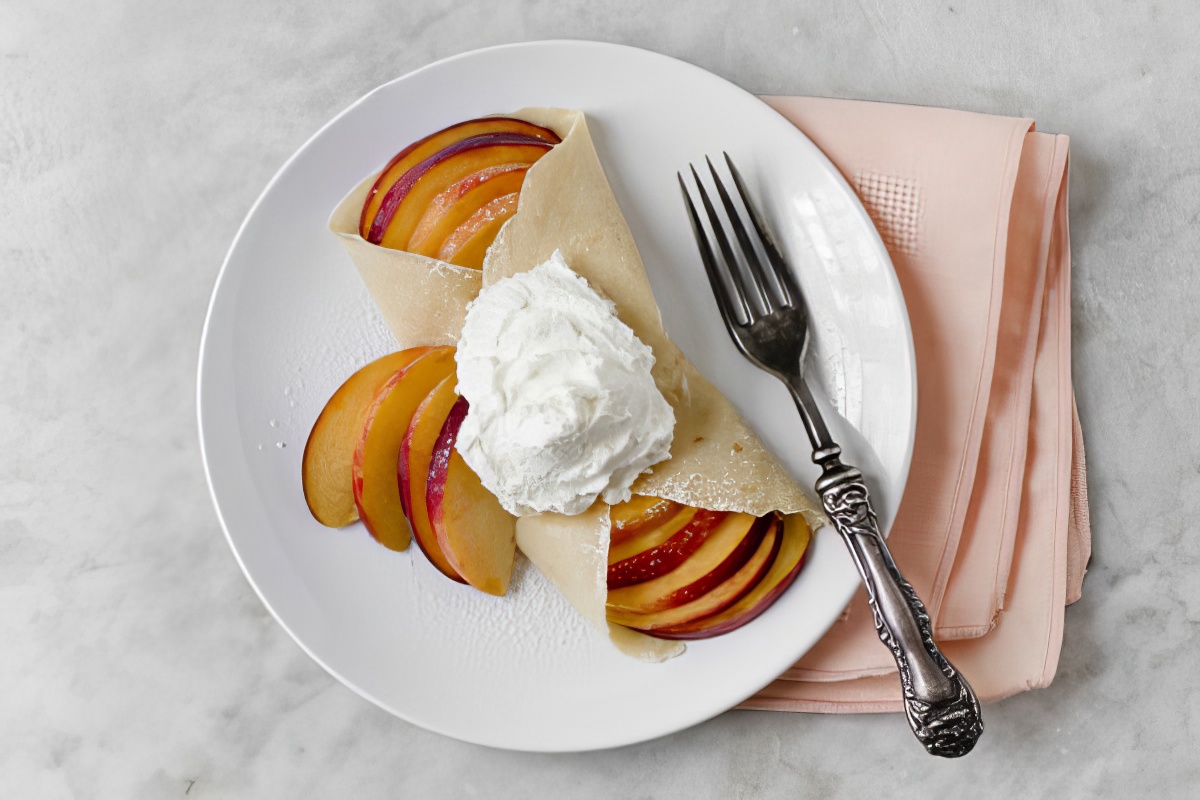
Now it's time to serve your crepes! You can make them as plain or as fancy as you like. Just a sprinkle of powdered sugar is fine, or you can get creative. Here are some of my favorite ways to top crepes:
Sweet Crepe Fillings:
- Strawberries and whipped cream
- Nutella and sliced banana
- Caramelized bananas
- Peaches and cream
- Apples and cinnamon
- Ricotta and lemon
Savory Crepe Fillings:
- Spinach and Gruyere
- Scrambled eggs and cheese
- Tomato and basil
- Sautéed mushrooms
- Spinach and ricotta
- Broccoli and cheddar
Storing Crepes for Later
If you're making your crepes for later, you can stack them between sheets of parchment paper to keep them from sticking together. When they're completely cooled, put them in a large zip-top freezer bag.
Crepes will last for 3-5 days in the refrigerator and 2-3 months in the freezer. When ready to serve, they'll heat up in a few seconds in a non-stick pan or in the microwave.
📖 Recipe
Ingredients
- 2 eggs, large
- ¾ cup whole milk
- ½ cup water
- 1 cup all purpose flour
- 2 tablespoon butter, melted
- ¼ teaspoon salt, optional, for more savory crepes
- 1 teaspoon vanilla extract, optional, for sweeter crepes
- extra butter, for greasing the pan
- see article above for crepe filling ideas!
Instructions
- Add all of the ingredients to a blender or food processor, and process until just smooth. Put the crepe batter into the fridge to chill for at least one hour.
- Heat a nonstick pan over medium heat. Add a small dab of butter, allowing it to melt and coat the pan.
- When the pan is hot, pour a small amount of batter (approximately 2 tbsp) into the center of the pan, similar to making a pancake. Cook the crepe for 30-45 seconds. Flip the crepe over, and cook for another 10-20 seconds. Remove the cooked crepe from the pan and set it aside to cool. Repeat for the remaining crepes.


Kelli @ The Corner Kitchen says
Crepes are the best!! Such a great tutorial!
Katie Trant says
Thank you 🙂
Caroline says
Try a crepe with just butter on it. Just like people love them in Brittany France... You'll love it! 🙂
Katie Trant says
Mmmmm, sounds delicious. Simple, and perfect.
Rivki Locker says
What beautiful photos. Love how you illustrated this process. My family adores crepes, but they are such an effort, we usually save them for (very) special occasions. Your photos are tempting me to make them soon!
Katie Trant says
Rikki takes beautiful photos, doesn't she! Crepes are great for special occasions, but if you cook up a big batch and freeze them (instructions at the end of the post) you've got crepes on hand for whenever you like!
Maria says
I like mine with thin-sliced strawberries, a splash of cognac, sprinkle with shaved dark chocolate and thin-sliced almonds. My other favorite is just a splash of Grand Marnier and sprinkle with shaved dark chocolate. Deeeeelish!
Katie Trant says
Strawberries and cognac! Grand Marnier with dark chocolate! You've just kicked things up a notch! What great ideas, I'll have to try them out next time I make crepes.
Millie | Add A Little says
I love crepes! These look so perfect!
I better get practising on my technique haha!
Katie Trant says
Get practicing!
Nicole @ Foodie Loves Fitness says
Sweet, I'm bookmarking this for sure. Usually when I try to make crepes, they turn out more like pancakes, so I could definitely use this tutorial!
Katie Trant says
It's a bit of a trick getting the right about of batter in the pan, but start with a hot pan, a small amount of batter, and a good swirl to coat. Just keep practicing until you get the perfect crepe!
Joanne says
Crepes are a fairly new foodie love of mine! I even got a special electric crepe maker just so I could make them without fear...but now I feel very tempted to try them out on one of my regular nonstick pans!
Katie Trant says
Electric crepe maker?! You lucky girl!
Kim @ Hungry Healthy Girl says
I've been wanting to give crepes a try for awhile. Thanks for the great tutorial.... can't wait to give it a try!
Katie Trant says
It's easier than you think! Be sure to let us know how your crepes turn out 🙂
Laura (Tutti Dolci) says
Gorgeous crepes, I love the peach filling!
PJ Emm says
Am I missing the actual recipe measurements?