Equipment
- Cakesicle Molds with popsicle sticks
Ingredients
FOR THE CAKE
- 3 cups all-purpose flour
- 1 tablespoon baking powder
- ½ teaspoon baking soda
- ½ teaspoon salt
- 2 ¼ cups sugar
- 1 cup butter, 2 sticks
- 2 eggs
- 1 ⅓ cups milk , (you can use Soy, or Almond, or whatever you prefer)
- 1 teaspoon vanilla extract
FOR THE FROSTING
- 2 sticks butter
- 4 cups powdered sugar
- ¼ cup milk, plus up to ¼ cup more, as needed
- 1 teaspoon vanilla extract
- gel food coloring, blue or your favorite color
FOR THE COATING - OUTSIDE LAYER
- 12 oz white chocolate melts, divided (have a few extra ounces on hand)
- candy eyes, about 24 (2 per cakesicle)
Instructions
FOR THE CAKE
- Preheat the oven to 350°F (175°C).
- In the mixing bowl of a stand mixer, cream the butter and sugar until light and fluffy.
- Add the vanilla and eggs, and mix until completely blended.
- In a separate bowl, mix the flour, salt, baking soda, and baking powder, until well blended. Add the flour mixture and the milk to the mixing bowl, a little at a time, mixing on low speed between additions until all ingredients have been added. Mix on high for about 1 minute to make sure all ingredients have been well incorporated.
- Coat the bottom and sides of a 9 X 13 baking pan with butter or non-stick cooking spray, and pour the cake batter into the dish.
- Bake for 30 to 40 minutes, or until a toothpick inserted in the center comes out clean. Remove to a wire rack to cool completely.
TO MAKE THE FROSTING
- Wash and dry the mixing bowl and whisk attachment. Add the 2 sticks of softened butter, milk, and vanilla to the mixing bowl, and mix to blend. Add a few drops of the food coloring, if using.
- Add the powdered sugar a little bit at a time, mixing on low speed until all the sugar has been added. If the frosting is too stiff, beat in more milk a tablespoon at a time; if it's too thin, add a little more powdered sugar until it's thick and spreadable.
TO ASSEMBLE THE MUMMYSICLES
- Place the frosting in the refrigerator until the cake is cool. When the cake is cool to the touch, break it up into fine crumbs. You can do this right in the pan it was baked in. Add the frosting a little at a time (start with about 1 cup) and stir the cake and frosting together until the mixture holds together when you squeeze it. It should be thick enough to hold its shape in the cakesicle molds without feeling greasy or sticky, so you may not need all of the frosting. Set aside.
- In a microwave-safe bowl, melt the white chocolate in the microwave in 10- to 15-second intervals, stirring between each, until it's smooth.
- Spoon a bit of the white chocolate into each cakesicle mold cavity, and tilt the mold in both directions to coat the inside completely with a thin layer of white chocolate. Place the molds in the freezer for 30 minutes to allow the chocolate to set.
- When the chocolate is set, place a heaping spoonful of the cake mixture into each mold and press it in firmly to form the cake pop, leaving a little room at the top. Insert a popsicle stick into each cavity through the notch at the end, pressing it about halfway into the cake mixture. Reserve a bit of the white chocolate for decorating.
- Rewarm the white chocolate in the microwave for a few seconds if needed. Spoon it over the cake pops, using a spatula to completely cover and seal the back of each cakesicle. Place the molds in the refrigerator for about 1 hour to completely set the white chocolate.
- When the chocolate is set, gently peel the molds away and remove the cakesicles. Place them on a sheet of parchment paper.
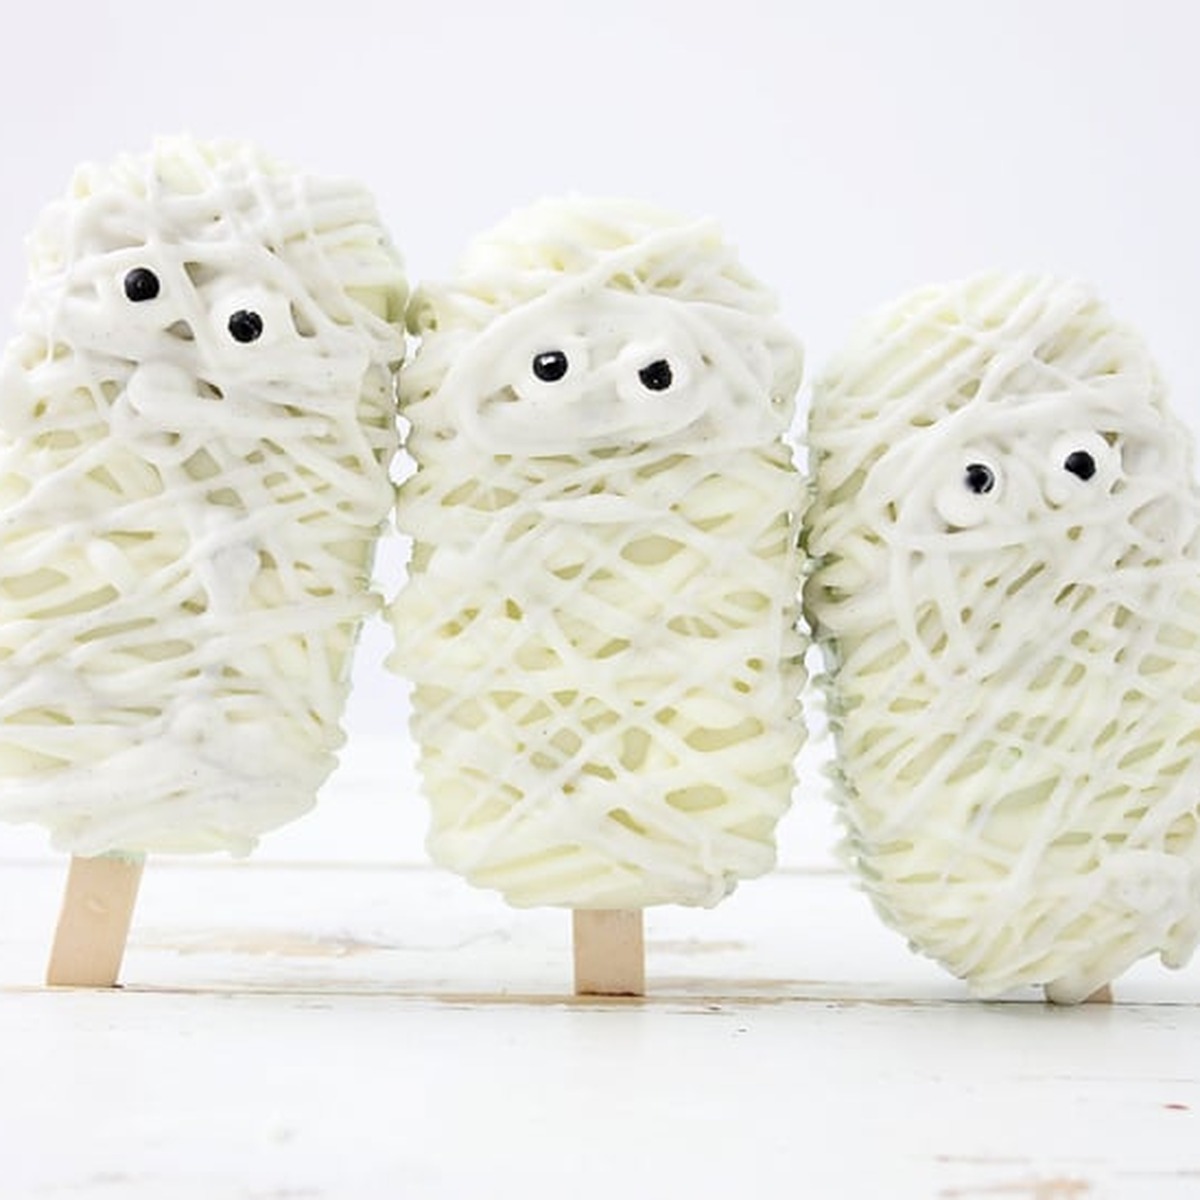
- Rewarm the remaining white chocolate until it is smooth and melted. Spoon it into a pastry bag and snip off the tip of the bag, leaving only a small hole. Drizzle the white chocolate back and forth across the cake pops so it looks like bandage wrappings on each mummy.
- Add the candy eyeballs, using a bit of melted chocolate to stick them to the mummy.
- Place the cake pops in the refrigerator for about 1 hour to allow the drizzled chocolate and eyes to set.
Video
Notes
If you don't have a pastry bag, use a spoon to drizzle the chocolate over the mummy cake pops.
A full 9x13 cake plus frosting makes more cake pop filling than 12 cakesicles need. Roll the extra into cake balls and dip them, or freeze the leftover crumbs for another batch.
To make these vegan, use a vegan white cake, dairy-free buttercream, and dairy-free white chocolate melts (see the post for suggestions).
Nutrition (estimated per serving)
Calories: 869kcalCarbohydrates: 120gProtein: 7gFat: 42gSaturated Fat: 26gPolyunsaturated Fat: 2gMonounsaturated Fat: 11gTrans Fat: 1gCholesterol: 118mgSodium: 541mgPotassium: 185mgFiber: 1gSugar: 95gVitamin A: 1044IUCalcium: 174mgIron: 2mg
Craving more veg-friendly recipes? Shop our collection of vegetarian and vegan cookbooks, including our new Vegan Thanksgiving and Vegan Christmas cookbooks!
